


One click to make your Color Ramp ten times better (Rapid Fire Tips)
Simple tips that can make a big impact.

I have a list of potential tips I might cover in this newsletter. And for each one of these posts I like to create a theme/topic that all the tips revolve around, but some of these just don’t really fit into a specific topic. So for this post I decided to share a bunch of smaller, random tips that have improved my project in quite meaningful ways. The first one is super easy to apply in your own projects…
Supercharge your Color Ramp
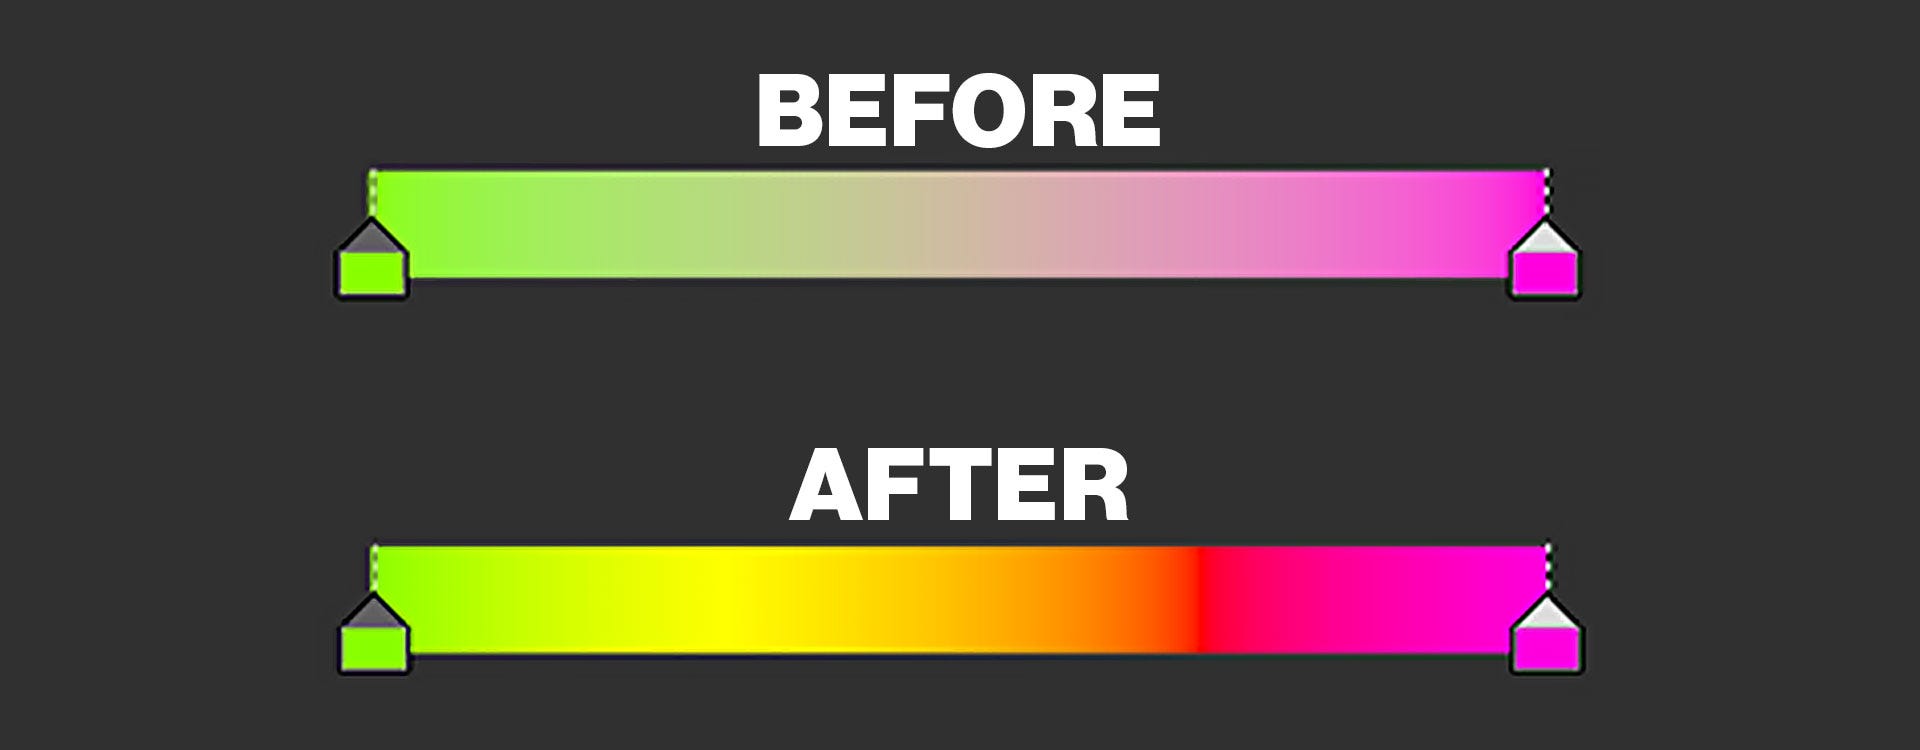
The Color Ramp node in the Shader Editor can be a great tool to create a multi-colored gradient with ease. But the bigger the difference between the colors of your gradient is, the more desaturated the middle of the gradient (the midpoint between two handles) will be.
But there’s a way to bring back the lost saturation!
All you need to do is change the Color Mode from RGB to HSL or HSV and change the interpolation to “Near”

The reason why these modes create much more saturated gradients is because of the way they get from one color to the other.
Disclaimer: I’m not a color expert and might be wrong in the details!
If you look at the Color Wheel in Blender and choose two different colors as the base for your gradient, the way the RBG Color Mode creates the gradient from one color to the other is by drawing a straight line from one to the other.
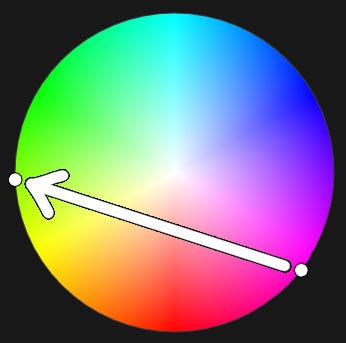
This means that if they’re on opposite sides of the circle, the line goes straight through the desaturated middle.
The HSL and HSV (Hue, Saturation, Value or Lightness) modes on the other hand go around the middle.
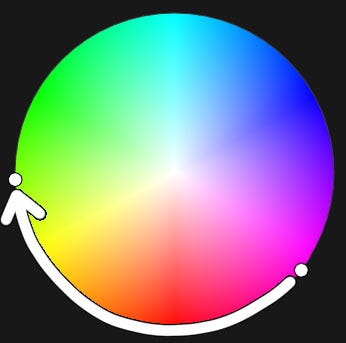
This way the gradient will first of all include more colors between the two base colors, but also stay as saturated as it can.
Both have their use cases, but in my opinion the HSL/HSV modes look better 81% of the time.
More useful hotkeys!
On my mission to make my workflow as efficient as possible, custom hotkeys have become my new obsession. I have already covered the amazing benefits of them in a previous post. One aspect that has probably the most potential to benefit from them is the Shader Editor.
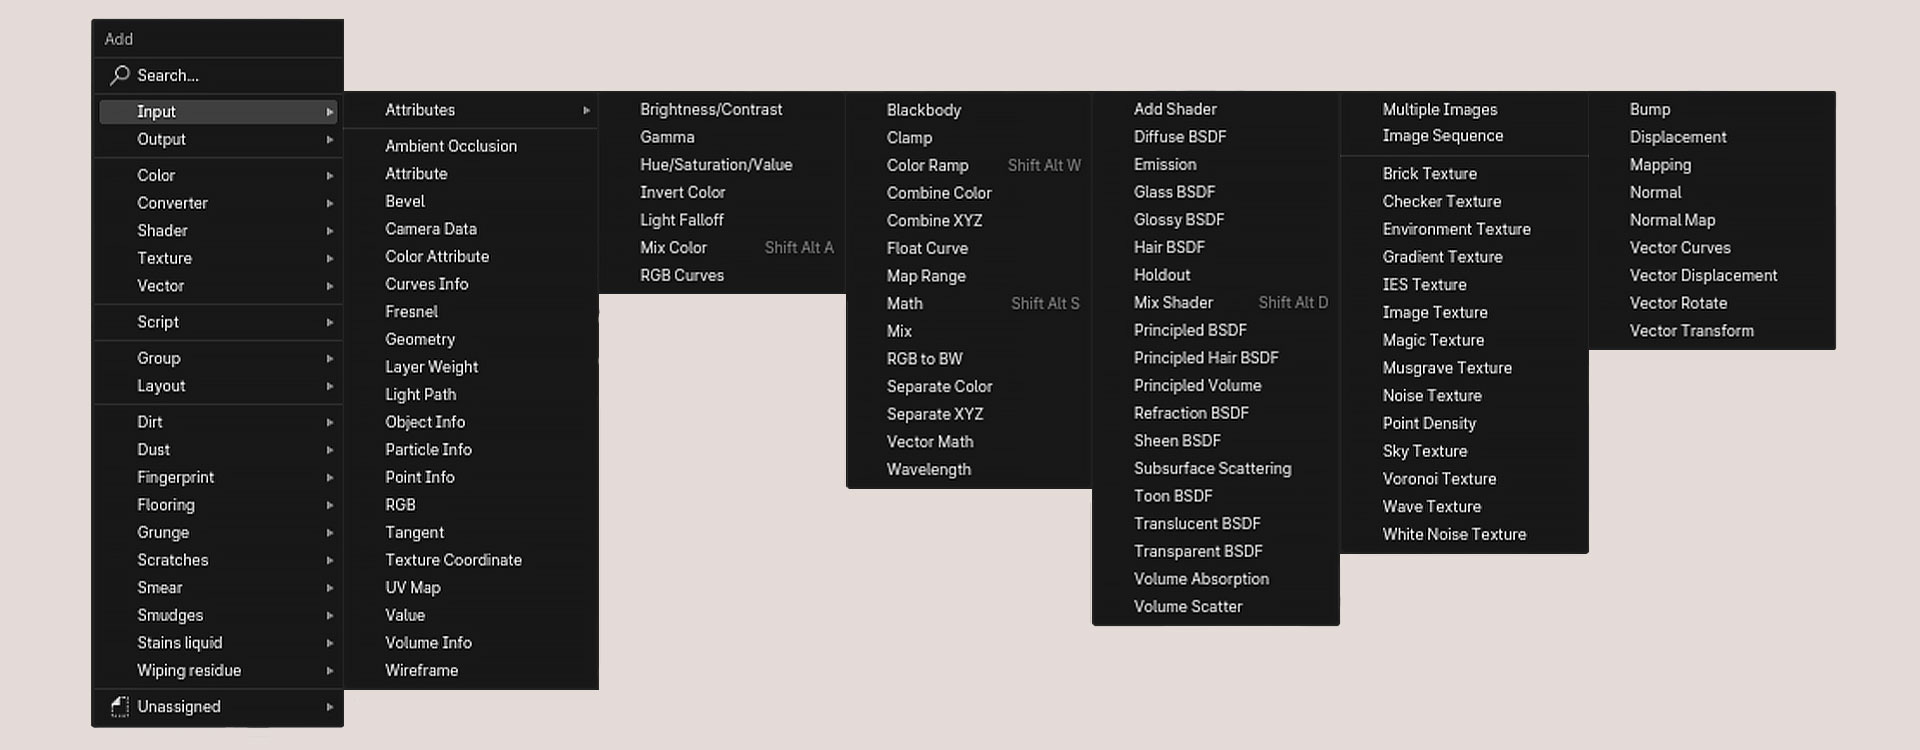
The Add Menu (SHIFT + A) gives you a false sense of speed! It’s reasonably quick to find the node you’re looking for, but I find myself always taking a few seconds to enter the correct subcategory, to select the node I need.
So why don’t we assign hotkeys to the most used nodes?
I have only assigned four so far but they have already been super useful and make working in the Shader Editor much more frictionless:
SHIFT + ALT + W to add a Color Ramp Node
SHIFT + ALT + S to add a Math Node
SHIFT + ALT + D to add a Mix Shader Node
SHIFT + ALT + A to add a Mix Color Node
So next time you find yourself repeating the same task over and over again, maybe there’s a way to assign it to a single button press. :)
Turn your environment into an HDRI
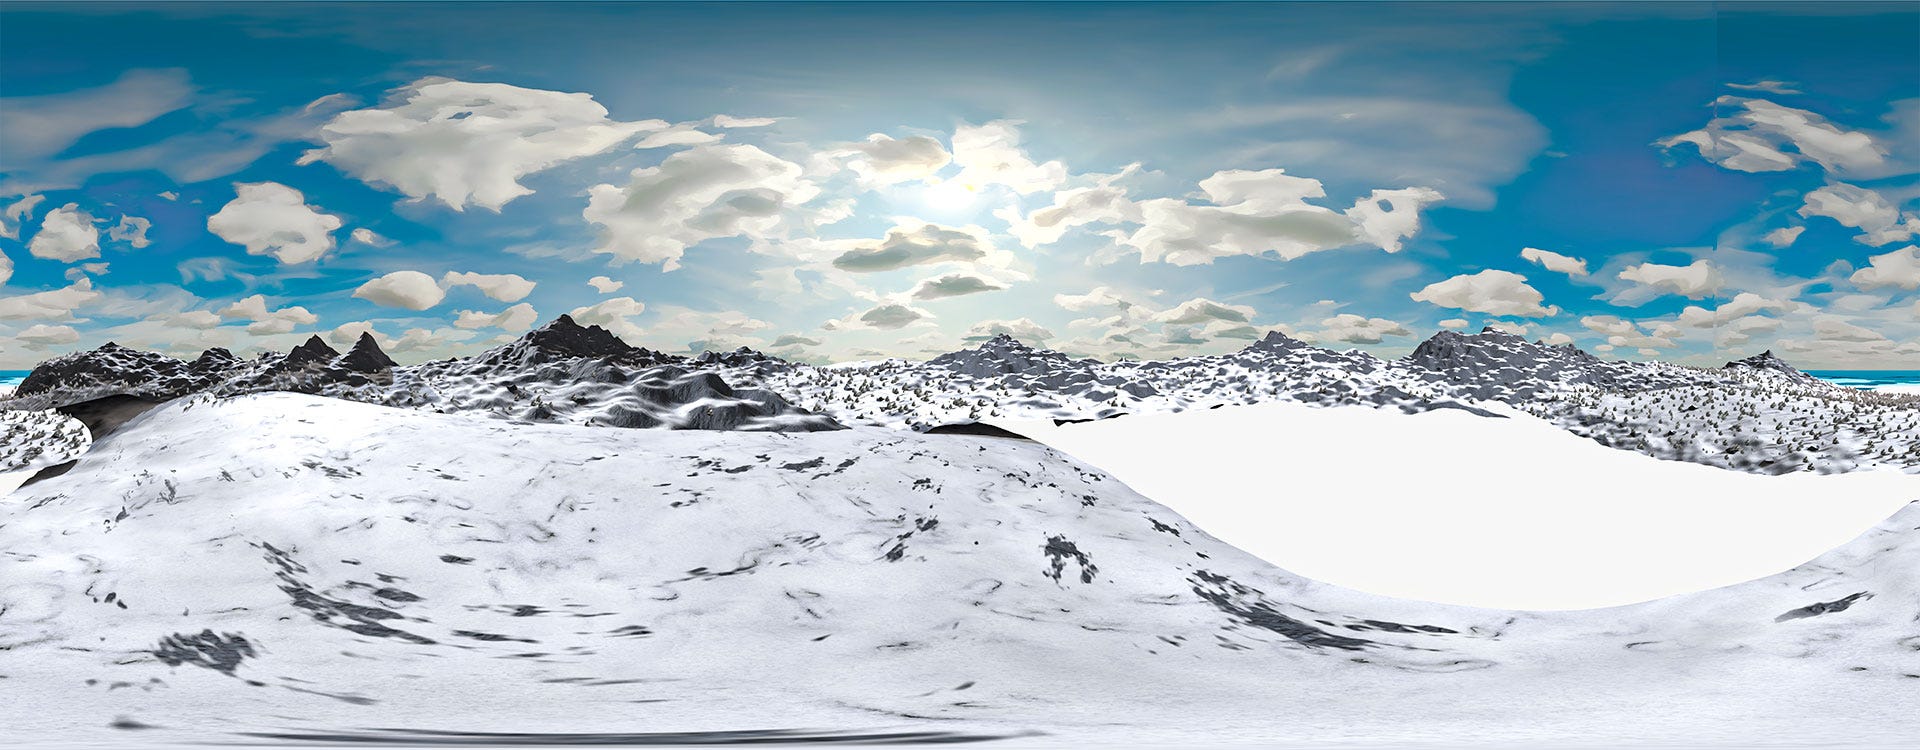
For my “Animating Berserk in Blender” video, I created a huge mountain environment around the main animation area. And to save a lot of performance I rendered this environment out as a 360° image, so I can add it back in as a simple skybox (sphere with HDRI texture applied to it) for the final animation.
The process is pretty simple:
Add a camera to your scene and place it in the middle of your environment.
In the Properties Panel > Data change the “Type” to Panoramic and the “Panorama type” to Equirectangular.

Now all you need to do is render the image. But keep in mind:
To save the lighting from the original 3D scene make sure to save the render as an Open EXR MultiLayer file with full color depth.

If the HDRI is supposed to be clearly visible, make sure to set the render resolution to at least 4096 x 2048. In my Berserk animation the HDRI resolution was 8192 x 4096.

Now in case you’ve created a cool custom environment, you can save and reuse it super easily. Just keep in mind that the direct influence of light objects will not be saved, only bounce light that reflects off of the objects in the environment.
If you want to save the lights as well, you need to recreate them with actual geometry, like an emissive plane for example.
Volumes… but simpler
Recently I remembered a trick I learned while working on an Unreal Engine project last year.
Using cloud textures to imitate volumes.
Adding clouds or mist can add a lot of depth to your scene and make it feel more alive.
The problem is that volumes can take a long time to render without noticeable noise, especially for animations.
So instead, let’s just use image planes.
This technique works really well for the background of your scene, to just add a little more detail.
Since these are just planes they won’t react to light as realistically as actual 3D clouds would, but as long as they’re not the main focus, that shouldn’t be super apparent.
Here’s another scene where I have used a ton of them.
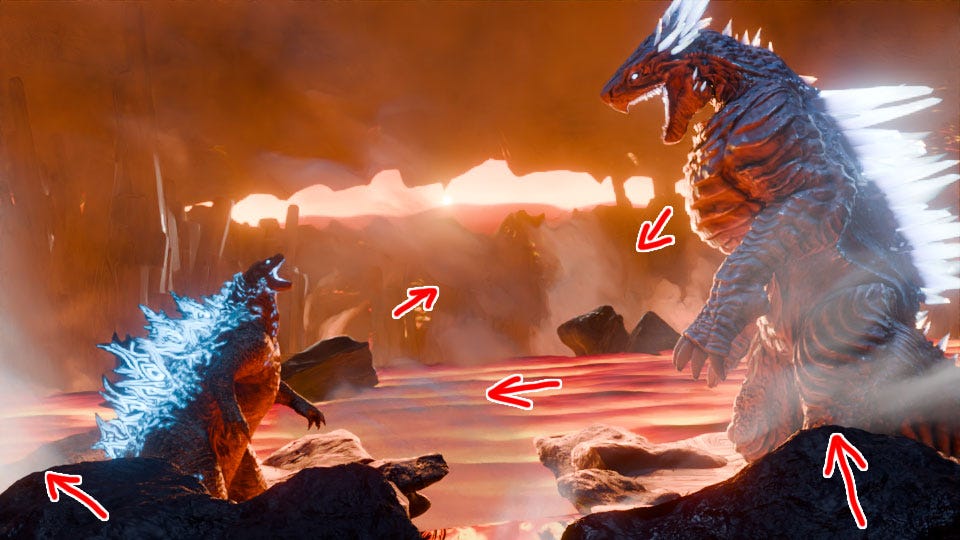
Now if you try this yourself, you might run into a problem if the cloud is supposed to interact with the environment.

Obviously clouds don’t just clip into other objects, and there are two main ways to fix this:
The Ambient Occlusion Node - If you’re using Cycles to render your scene, this node might work for you. It detects where two objects come close to each other and outputs a value from 0 to 1 depending on how close they are. With a Color Ramp node, you can define the gradient a bit clearer and by multiplying this with the texture that you use for the transparency, the cloud fades out as it gets closer to other objects.
This technique can work really well if you place a few of these planes in different places. It will not work if you place multiple cloud planes in front of each other. Then the one in front will just hide the one behind it.

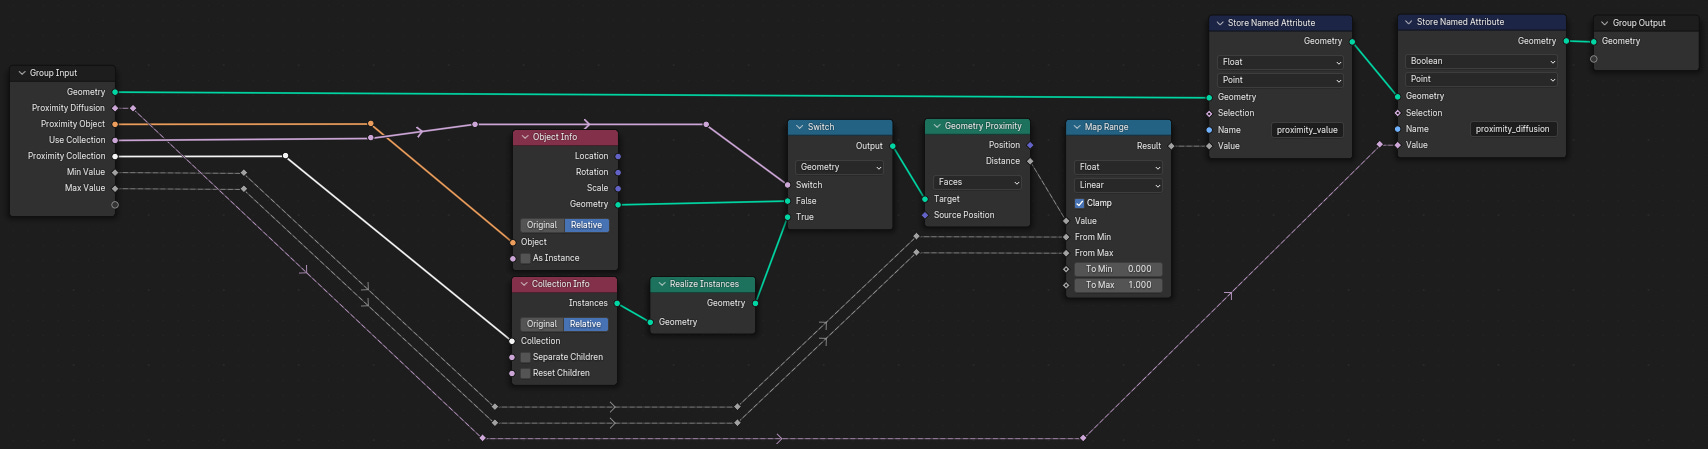
Geometry Proximity Node - This technique uses Geometry Nodes to detect close objects. Explaining this in depth would be too long for this post so if you want to learn more in depth how this works you can check out THIS video by Benjamin Weimer.
For this technique the plane needs to be subdivided a couple of times, because the 0 to 1 values get saved in the vertices of the mesh. This value get’s saved as an attribute and then used in the Shader Editor to fade out the cloud. In my Geometry Node setup I have added an option to select a single object or multiple objects in a collection.
The Map Range node allows me to fine-tune how the cloud fades out and the “proximity_diffusion” attribute allows me to enable or disable this fade-out. Without it you would always have to have a proximity object selected, otherwise the cloud would just be fully transparent.
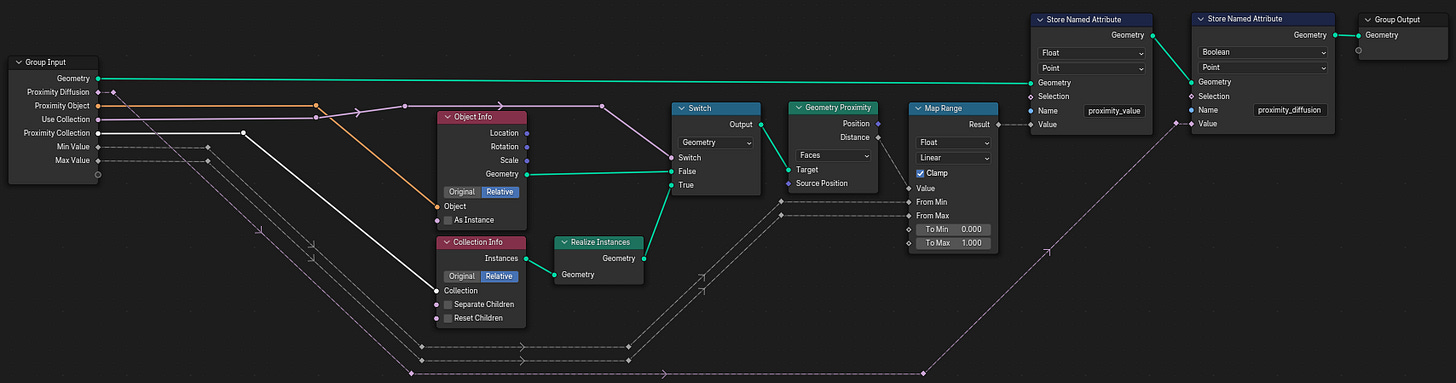
The Geometry Nodes setup 
The Shader setup


I highly recommend trying this technique, especially for still shots since you can get away with much more tricks in those and these clouds can drastically improve the overall shot. The cloud textures I use are from the Easy Fog pack for Unreal by William Faucher. To use them in Blender, you first have to export them from Unreal.
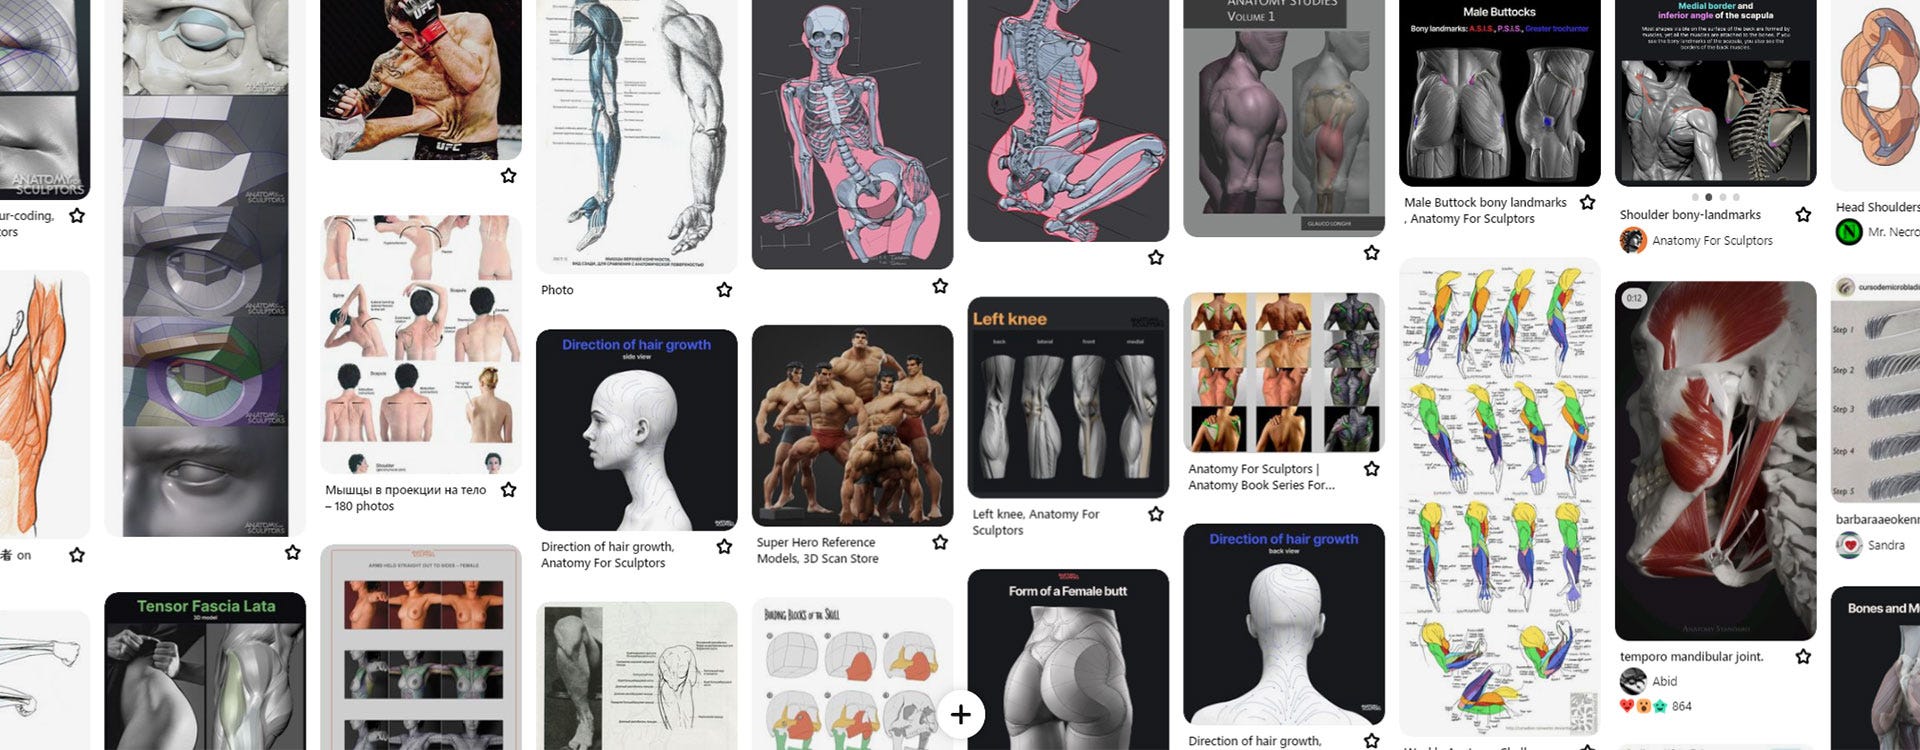
Finding References
If you want to create characters you will have to learn correct anatomy. But finding the right references for what you’re looking for can take a while and often times you find the best ones AFTER you’ve finished the actual project.
It’s the exact same for me, so a while ago I decided to save all my references on Pinterest.
In my opinion, Pinterest is much better for finding images you’re looking for compared to Google, plus you don’t have to download them all. You can just save them in your own Pinterest boards, which then allows you to find more images like the ones you have in that board.
But the best part is that you can also follow other people’s boards. So if you want, you can get all of my own references for free with just a few clicks and save them on your own profile.
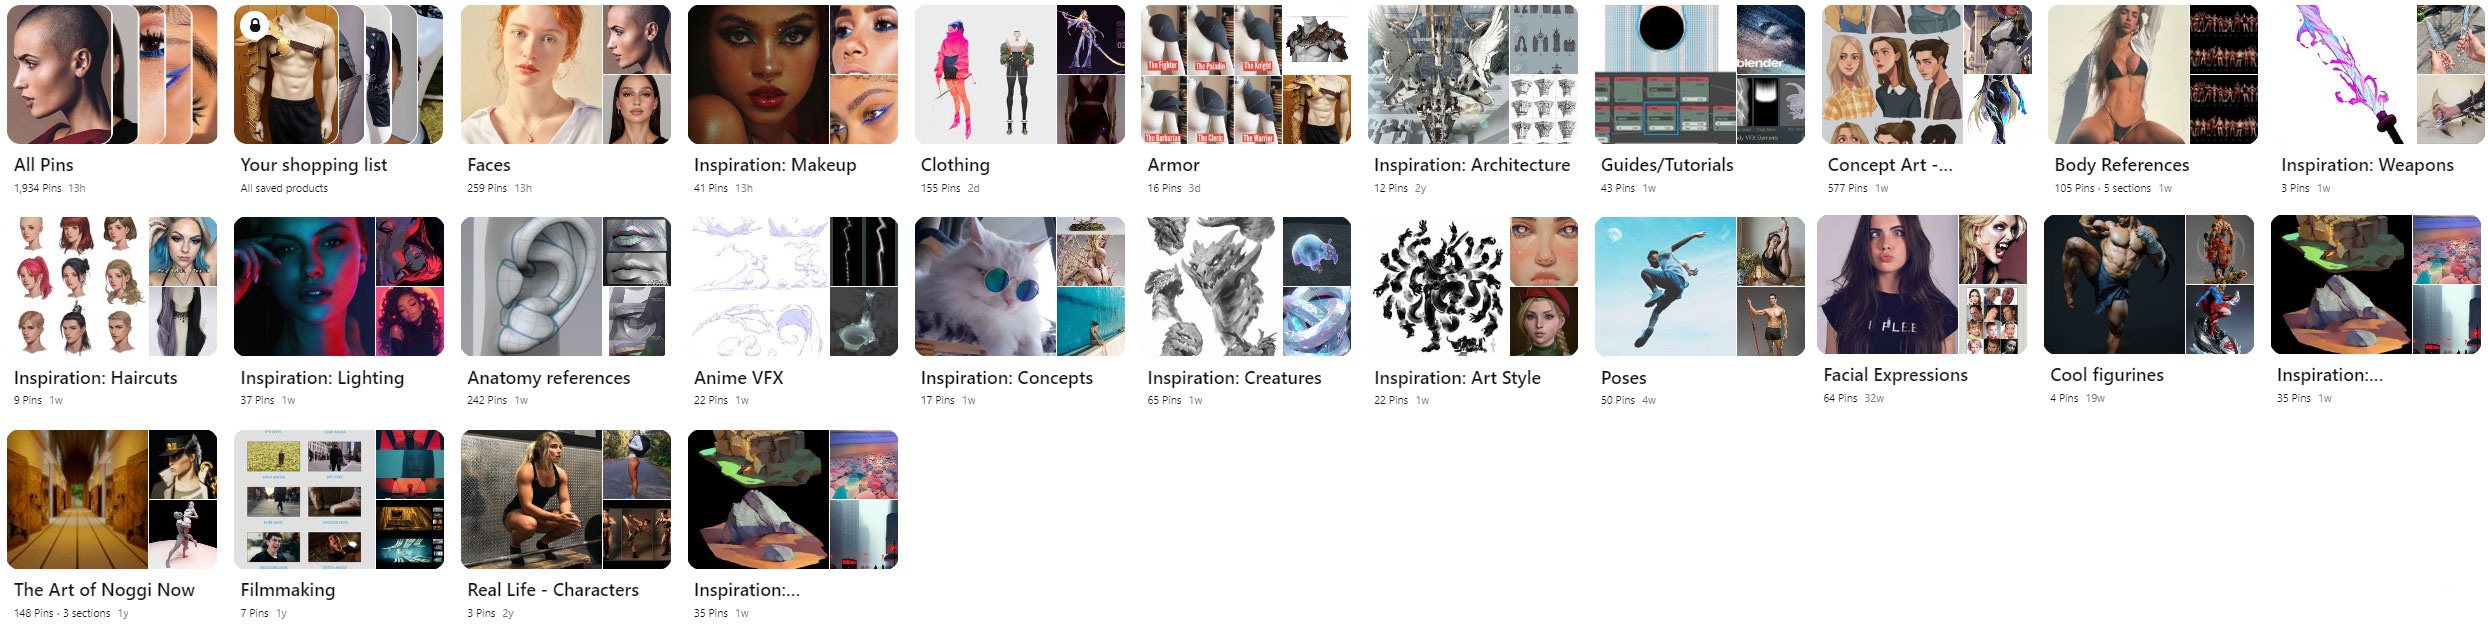
Pinterest has been a great tool in my own workflow and I think it can improve yours as well.
I hope these tips can make your project at least 1% better. :)
Since this is the first post that actually get’s sent out to more people than just myself, I just wanted to clarify again that I don’t have a set release schedule for these. whenever I can find the time and have enough to write about I will release another one. Just to set your expectations for how often you can expect to get one in your inbox.
Quality over Quantity!
If you know someone that might find this post useful, feel free to share it with them.
And if you have any further questions you can either reply to this email/ post them as comments under this post or join my Discord server, where I have a dedicated channel for any questions around Blender and 3D in general.