


Unusual methods that speed up your workflow immensely
I've saved hours with these!

Recently I started to optimize my workflow and all the processes for my projects, so that I can just get more done. I have never seen tutorials about these methods before so I don’t think you have either.
The first method is very simple, but can be extremely powerful.
Hotkeys
Learning the default hotkeys for the tools and functions you use most often can already save you a ton of time.
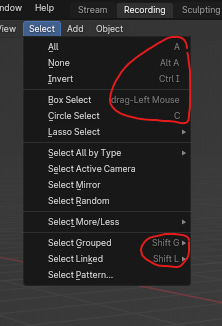
And luckily most key combinations are actually displayed right next to the function they are applied to, in the menu. So you don’t have to go through the whole list in the preferences to learn them.
But the real power lies in customizing your hotkeys.
I usually customize my hotkeys in every program and game, but it took me 5 years to do it in Blender. One reason for that is probably that it’s just very unintuitive and complicated.
But once you start setting up your custom hotkeys you can immediately feel how much quicker you can work with them.
There are two main ways to customize your hotkeys:
Right Click
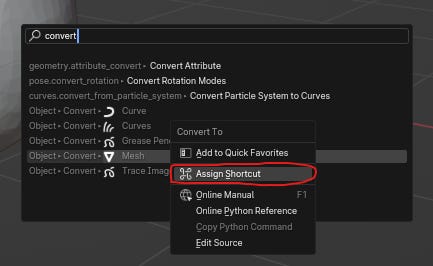
If you can find the function in the menus or with the search function, you can right-click it and assign/change the shortcut right there.

This technique is the best for most cases.
The only problem arises when you override another important function you can’t find in the menus or want to have a better overview over all hotkeys.
Then you need to use…
the preferences.

There are seemingly thousands of functions you can give a custom hotkey to and finding the one you’re actually looking for can be pretty hard.
I would recommend to search for what you’re looking for first and if you can’t find it, you’ll need to go through the list manually.
If you know the name of the function, you can select “Name” at the top and type it into the search bar.
If you know the hotkey, you can select “Key-Binding” and type that into the search bar.
It can be difficult to find exactly what you’re looking for, but luckily you only have to change it once. :)

Here are some of my custom hotkey recommendations:
Confirm deletion

Unchecking this box removes the confirmation box that pops up every time you want to delete something. 👇

If it takes you a second to click this box, over time you’ll save a lot of seconds.


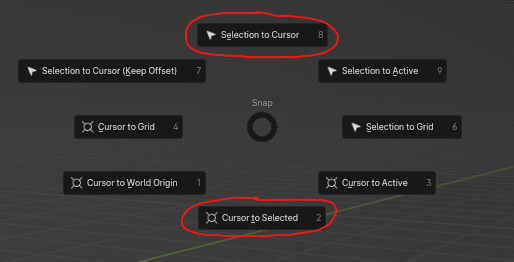
Cursor to Selected + Selected to Cursor
The 3D cursor can be very useful to serve as a custom pivot point for your objects.
You can transform around it, but also snap elements to it.
So adding custom hotkeys for both of these functions can save a considerable amount of time.
You can find both of them in a radial menu by pressing SHIFT + S

Adding Primitives
I noticed that whenever I wanted to add another new primitive object it takes me a bit to find the exact one I’m looking for. So adding custom hotkeys for the most important ones can be super useful.

Stay around WASD
Try to make all your hotkeys available with one hand.
This way you don’t have to lift your other hand off the mouse or do crazy acrobatics with your keyboard-hand just to press a key that’s on the other side of the keyboard.
Since CTRL, ALT and SHIFT are in the same area it makes sense to move all your hotkeys over there as well.

I have just started really getting into custom hotkeys, but I can already feel how much faster I can work with them. It’s also much easier to stay in the flow of working if you don’t have to think about where a certain key is on the keyboard.
Custom Properties
I have already talked about them a little bit in a previous newsletter when I covered Drivers. If you want to check that one out…
In my experience, Custom Properties and Drivers are very dependent on each other, so understanding both at least broadly is important.
Disclaimer: Everything I’m saying here is based on my experience so far. So it might not be 100% correct or complete and I might change my mind at some point in the future.
Custom Properties in themselves are pretty simple. They’re basically custom settings you can add to an object.
Here’s an example to understand how that can be useful and save you A LOT of time:
You have a character with 3 eyes and each one of these eyes has a shape key to open and close the iris. You could add a Custom Property to one of the eyes with a float value of 0 - 1. Now you can copy that value as a Driver (check out my previous newsletter to learn more about that) to the shape key of each eye.
And by adjusting the single custom float value property, you can open and close the irises of all 3 eyes at the same time.
I hope this makes it easier to understand why they can be so powerful. Let’s take a closer look at how you can customize each property.
You can add Custom Properties in the Object and Bone tab of the Properties panel:
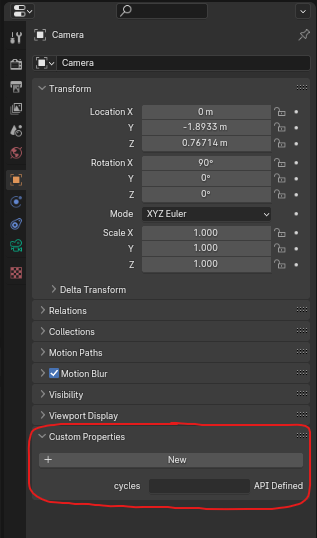
Once you click on the “New” button a new value will pop up called “prop”. To customize it you can click on the cogwheel next to it. To delete it, just click the X to the right of the cogwheel.

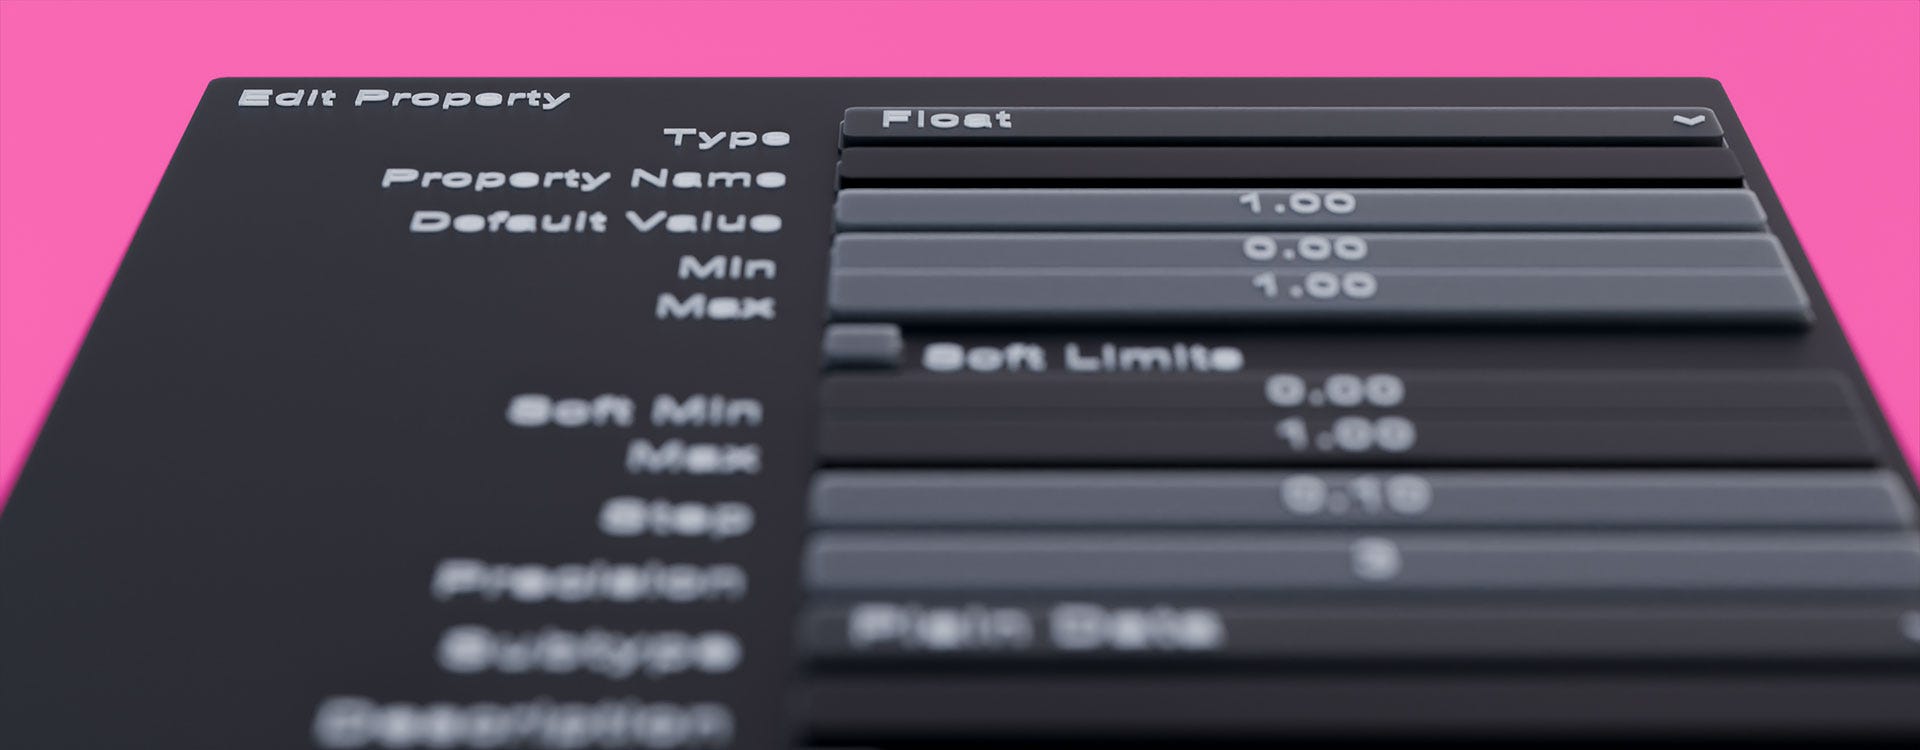
There are various things you can adjust in the property settings. Here are the most important settings you need to know to get started:
Type: What kind of value the property is supposed to be. Float, Integer and Boolean are the ones I’ve used so far.
Float values are decimal numbers (0.0055, 1.1234, 4.6125, etc.) and useful if you e.g. want to have a value that can change gradually.
Integer values are whole numbers (1, 2, 3, etc.) and useful if you want to switch between set values.
Boolean is a value of 0 or 1, represented by a checkbox and useful if you want to be able to enable/disable something.
Property Name: The name of the Custom Property
Default Value: The value this property defaults to, if it gets reset
Min; Max: The value range that this property covers
Library Overridable: Whether this property is supposed to be overridable if the object with this property is linked to a different blend file (important for the asset browser)
With Custom Properties I was able to collect a bunch of different settings that were hidden deep in shader setups and armature collections, and make them easily available in a single location on a custom “controller” object. Which means I never have to look for each slider anymore, saving me a ton of time and nerves.

Check out my previous newsletter to learn more about how I combined these Custom Properties with Drivers to achieve this.

Free Addons
In my effort to speed up my workflow I have also found some addons that can save you a lot of time. Some of them are well known, some of them I have never heard of, before I found them. This list only includes free addons. Maybe I’ll do another list for paid addons at some point in the future.
Rigify (pre-installed) - Let’s you create professional level rigs for whatever character you have. It’s way more than just premade rigs though. Here’s another shoutout to my previous newsletter where I cover why Rigify is amazing once you go past the meta rigs.
Node Wrangler (pre-installed) - Must have once you start working with materials, the compositor or geometry nodes. It adds a ton of new functionalities that make the workflow a lot easier.
Align Tools (pre-installed) - Let’s you align one or multiple objects to another one. Very useful if you want to copy the location/rotation/scale in one click.

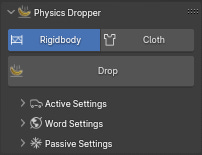
Physics Dropper (Blender Market) - The fastest way to set up rigid body and cloth simulations. Very useful if you want to realistically fill a basket of apples or simulate a messy blanket on a bed.
If you want to thank the creator and support the Blender Development Fund you can buy the addon on Blender Market. If not, in the description of the addon is a link to download it for free.

Grease Pencil Color Picker (Gitlab) - Let’s you create custom color palettes for your grease pencil materials including the ability to add a reference image. Making it much easier to find the colors you’re looking for. To learn more about it check out the talk from BlenderCon 2022 right here.

I’ll continue to look for more ways to speed up my process! Once I have enough I’ll write another one of these “speedletters” :D
Also if you have any tips, techniques or addons YOU would like to share, that have sped up your workflow, you can always comment under this post or @ me on Twitter.
If you know someone that might find this post useful, feel free to share it with them.
And if you have any further questions you can either reply to this email/ post them as comments under this post or join my Discord server, where I have a dedicated channel for any questions around Blender and 3D in general.